Tutorial of StreamOne for Windows
StreamOne is a great choice for streaming enthusiasts who want to download videos from 1000+ sites within a single app. With this tool, you can watch Netflix, Amazon Prime Video, Disney+, YouTube, Hulu, Max, Paramount+, U-Next, Apple TV+, Peacock, DMM, Hotstar, and various other 1000+ videos offline, all in high resolution.
You can also record livestreams, or any playable content from sites like OnlyFans, SkyShowtime, TikTok, Twitch, Viki, Tubi, Pluto TV, FaceBook, X, Instagram, Joyn, and more.
Equipped with a powerful recording core, StreamOne allows you to effortlessly save videos from multiple platforms in either MP4 or MKV format. It allows you to bypass platform restrictions and enjoy your favorite content offline. To begin, please download and install the latest version of StreamOne.
1. How to Register StreamOne on Windows PC?
StreamOne offers free downloads from some sites, and others require a paid license to function noramally.
- Free: YouTube, Abema, BiliBili, CBS, Dailymotion, Facebook, and TikTok.
- Paid: Netflix, Amazon, Disney+, Hulu, Max, Paramount+, Discovery+, U-Next, Apple TV+, Peacock, DMM, Hotstar, NHK+, Crunchyroll, and more.
Step 1. Launch StreamOne, then click the Key icon located in the top right corner. A registration popup dialog will appear.
Step 2. In the popup registration dialog, copy and paste or drag and drop the registration email and license code provided.

Step 3. After inputting the required information, click Register to complete the registration process.
Note: The registration information is case-sensitive. Please do not add any blank at the beginning or at the end of the registration e-mail and code.
2. How to Download Videos with StreamOne?
Step 1. Run StreamOne and Select the Website
Launch StreamOne on your PC. Choose the website from which you wish to download videos by clicking the icon to the right of the search box.

Step 2. Select Output Parameters
Click on the Gear icon positioned at the top-right corner to access the settings window. From there, you'll be able to customize settings such as video quality, audio and subtitle language, output path. You can also enable hardware acceleration and choose the video codec by clicking the Advanced tab in the Setting window.

Step 3. Log into Your Account and Search for the Video
Log into your account if you are prompted. With the built-in browser, you can access to the target site within the app. For finding the video you want to download, simply enter keywords or full name of the video directly into the search bar, and the desired video will show immediately.
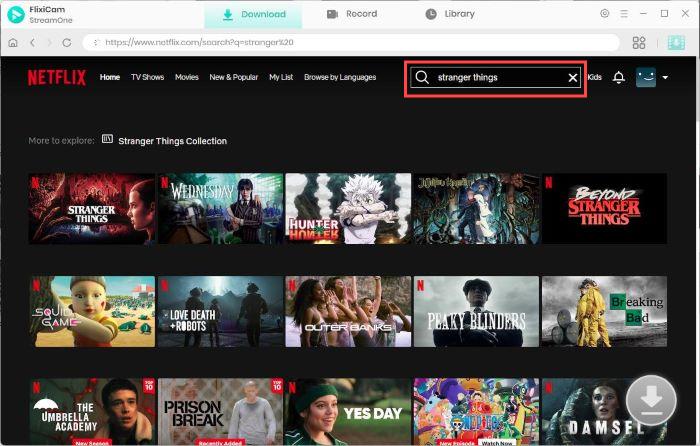
Step 4. Choose Season, Title, Video Quality, Audio Track, Subtitle
Click on the thumbnail of the video, which will lead you to the video's details page or playback page. At the same time, the download button located in the lower right corner will be activated. With StreamOne, you have the flexibility to choose different quality, audio track, and subtitle language for different videos.
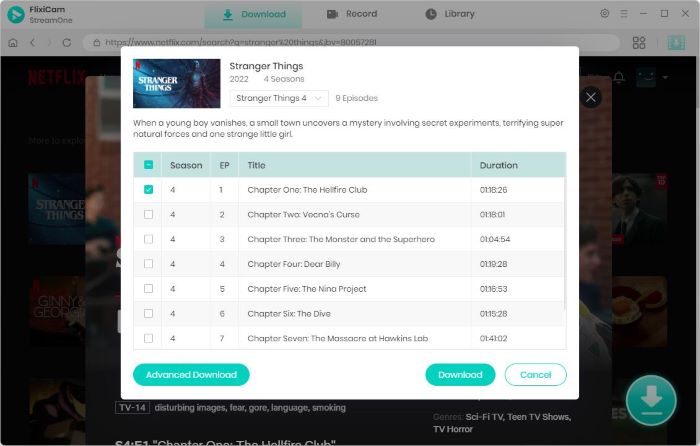
Once you've chosen your desired video, click on the "Advanced Download" button. This step enables you to choose settings such as video quality, audio tracks, and subtitles for specific episode of the series. To download a movie, just click the Download icon directly to open the Advanced Download window.
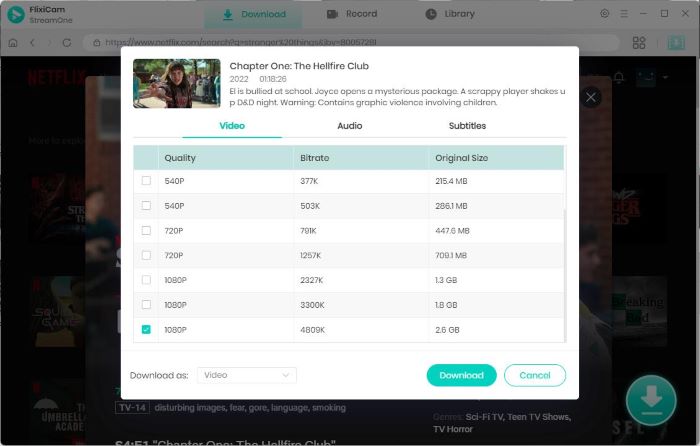
Step 5. Start to Download Videos
Just click the Download button, and the chosen videos will be downloaded to the output folder you've chosen in the previous step.
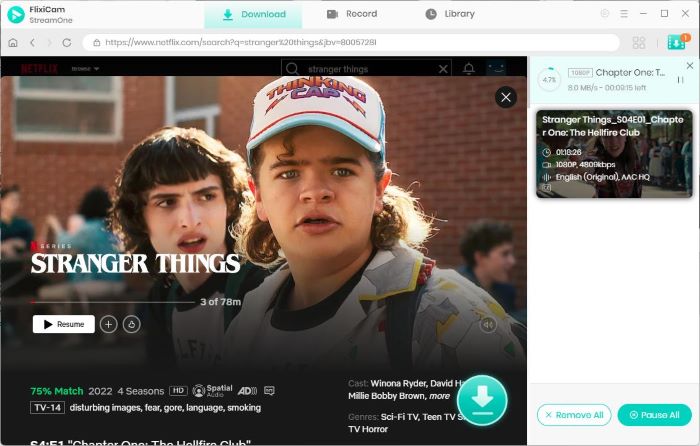
Once the download is complete, go to Library to locate the downloaded files on your local drive.
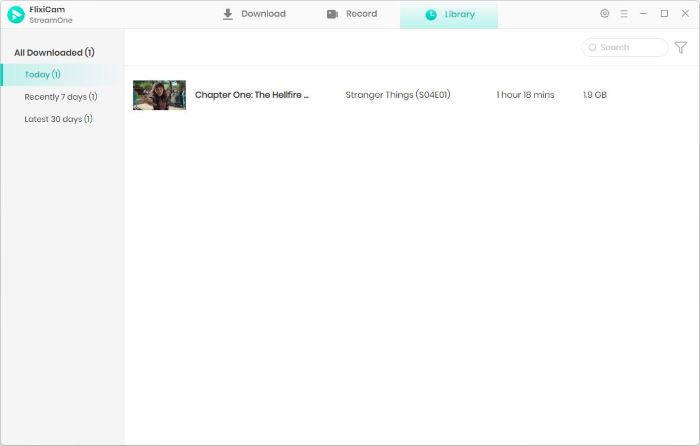
The downloaded movies and TV shows can be transferred to any device for offline watching. Start enjoying now!
3. How to Record Videos with StreamOne?
Step 1. Launch StreamOne and Enter URL of the website
Open StreamOne on your PC, click the Record tab, and enter the URL of the website into the address bar.
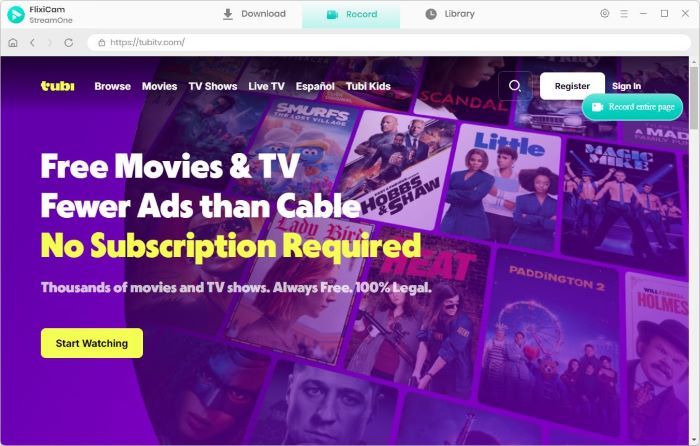
Step 2. Find the Target Video
StreamOne is equipped with a built-in browser, so you can stream the content you want to download directly in this program.
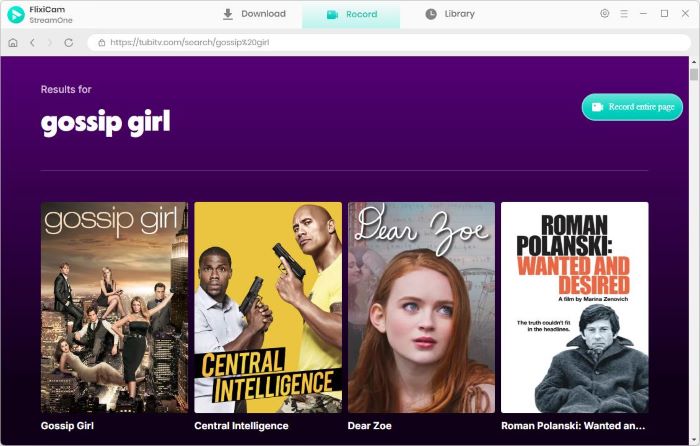
Step 3. Customize Record Settings
Click "Record entire page" when you enter the playback page. A window will pop up letting you select your desired video quality, with options ranging from 480p to 1080p. Additionally, you can set a countdown timer before the recording starts, giving you 3 to 15 seconds to prepare. You can also customize the duration of the recording so that the recording will stop automatically.
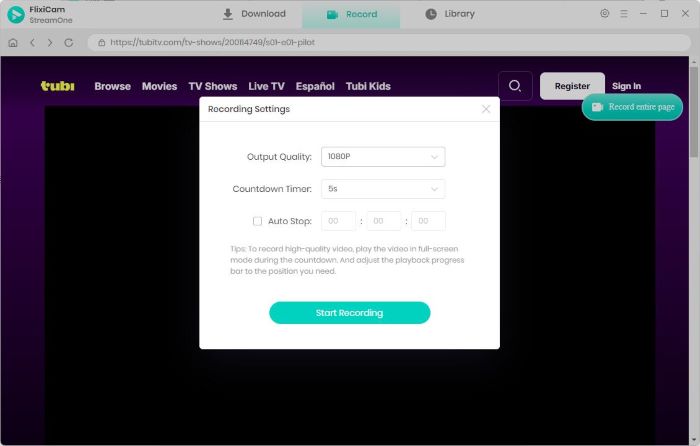
Step 4. Start Recording Video
Once the countdown finishes, recording will start automatically. A timer will appear on the screen, tracking the duration of your recording. To pause at any time, simply click the pause icon located in the upper corner. When you're ready to end the recording, click the stop button to save your video.

Once the recording process done, you can find the video files in the Library tab.
 DOWNLOAD Win
 Read User Manual